
|
la_1207_leaf(1).pdf Size : 46.277 Kb Type : pdf |
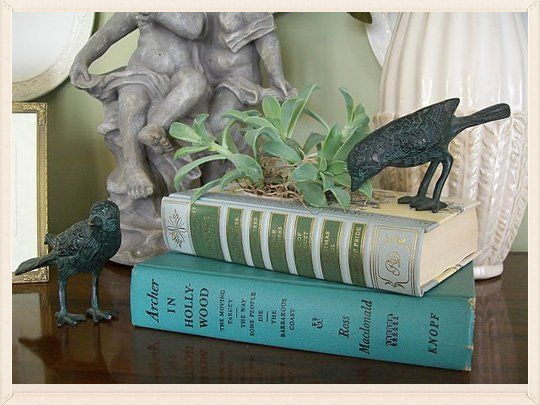
Book Planter
Find two books with covers that complement each other or the room where the planter will be displayed. For instance if it’s your kitchen look for a couple of cookbooks!
Use hot glue to join the books together, you may also want to rub a layer of white glue against the pages, this will just help keep the books from being opened. If you do this, do it the day before so its dry before you drill your hole.
Next mark where you would like the hole for the planter to be. With a 3” bit, drill the hole – do this very slowly so you don’t rip the book! When you have the hole drilled place a small container (like one from sour cream) in the hole measure and cut off to fit. The best plants for this container are succulents because they don’t need much water and can live in small containers quite well.
You will need 2-3 small succulents. Places like Home Depot sell them and they are very inexpensive. Be sure to get the types that grow flat or they will topple out of the container. Start with the main succulent and separate it from the soil that its packed in. Place it in the container and then repack the soil around it to keep it secure. A little water in the soil will help.
Once you get your plants where you want them fill in any spaces you have around them, next cover the soil with moss, this is usually available where you purchased your succulents. I looks nice, helps support your plants and covers the top of the container. About once a week spray a little bit of water onto the roots with a spray bottle.
Succulents need very little water but they do need a lot of sunlight so make sure they are in a sunny location! Or put them out side on a deck or patio where they get plenty of sun and are protected from rain.

Burlap Table Runner
Here’s what you’ll need:
- Burlap - cut to your desired final size. (A looser weave is easier to weave through. )
- Blunt needle with a large eye
- Spools of thin ribbon or cording
Start by measuring your table and cutting your burlap to the desired size. Be sure to add a few extra inches if you want your runner to hang over the sides of your table. Cutting is simple—just identify a single thread in the weave to use as your cutting guide, and carefully cut alongside that same thread for the entire length.
Once the burlap is cut to the desired size, you can pull out a few of the fibers along the very edges to create a neat raw edge fringe.
Next move onto the ribbon. Figure out how long you need your length of ribbon to be by laying it down along the length of the runner and adding about 3-4 extra inches. Thread your trim through the needle and start weaving. You can secure the end of the trim by weaving over & under every thread in the burlap for the first 1 ½ inches from the starting edge. Continue to weave the needle across the burlap in a straight line. When you reach the end, be sure to anchor your trim end like you did at the beginning, weaving over under each thread for the last 1 ½ inches to the end.
Unthread the needle and be sure the burlap is flat and the trim is not puckered. Trim the ribbon even with the edge of the burlap. Repeat this process for each of your colors. You can weave across both the length and the width of your runner using all your colors.
One tip: unless you have lots of time and patience, don’t make a huge runner. It’s much easier to maneuver a smaller size runner while you are weaving. You could also use this same technique for making a set of burlap place-mats.
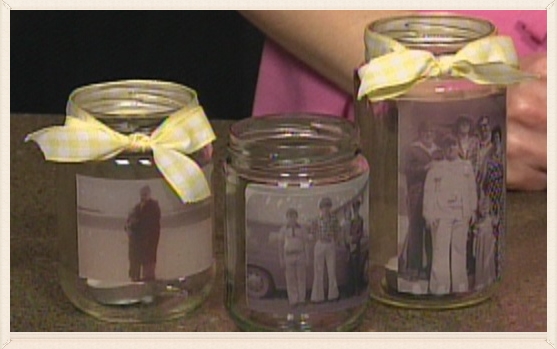
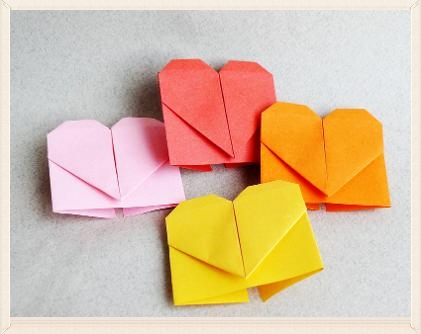
Glass Jar Candle Holder
Supplies:
*Assorted glass jars, recycled and clean (lids are not needed)
*Clear full sheet labels (8.5 x 11”) for ink jet printers. Avery brand labels (18665) are available on Amazon.com for $13 for a pack of 10 full sheets
*Scissors
*Ruler or tape measure
*Tea light candles or votives, either those with a wick or battery operated
*Ink jet printer
Instructions:
1. Select your photos. I like featuring one photo per jar, but you could put two pictures on each jar. I have selected some of my favorite vintage family photos to use for this project.
2. Measure the jar—the photos will need to be adhered to the flattest surface on the jar, so try to avoid including the curved top and bottom sections. Measure height and circumference.
3. Create a photo layout on your computer. I put my images into a Word document. Be sure to size the photos according to the measurements of the space available on the jar. You should be able to get several photos on one 8 ½ x 11” sheet. Leave a bit of cutting space between photos.
4. Print photos onto the clear shipping label sheet. Be sure to adjust your printer paper settings—I found that on my printer, the Photo Paper Pro setting prints the nicest looking images. I prefer to print in black and white, but you could also print in color.
5. Trim the photos and carefully apply them to the jar. Peel the backing off and then smooth out the photo while you are applying it to the jar.
6. To add color for our table I’m tying a sunny yellow ribbon around the top – just make sure it doesn’t get close to the flame.
7. Drop in a tea light or votive. If you are giving this gift to someone who lives in an apartment or dorm room where they may not be able to burn wax candles, just use a battery powered tea light.
The result is a warm and charming vintage glow that everyone will love.
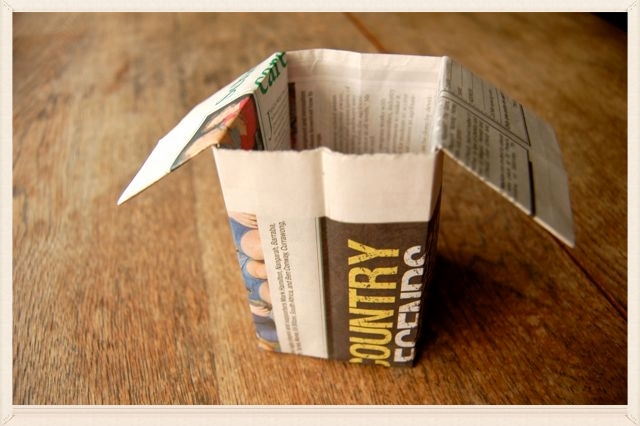
Make Ann's newspaper seed starters! Here's the link.

|
small crows.jpg Size : 814.328 Kb Type : jpg |
|
|
large crows.jpg Size : 732.234 Kb Type : jpg |
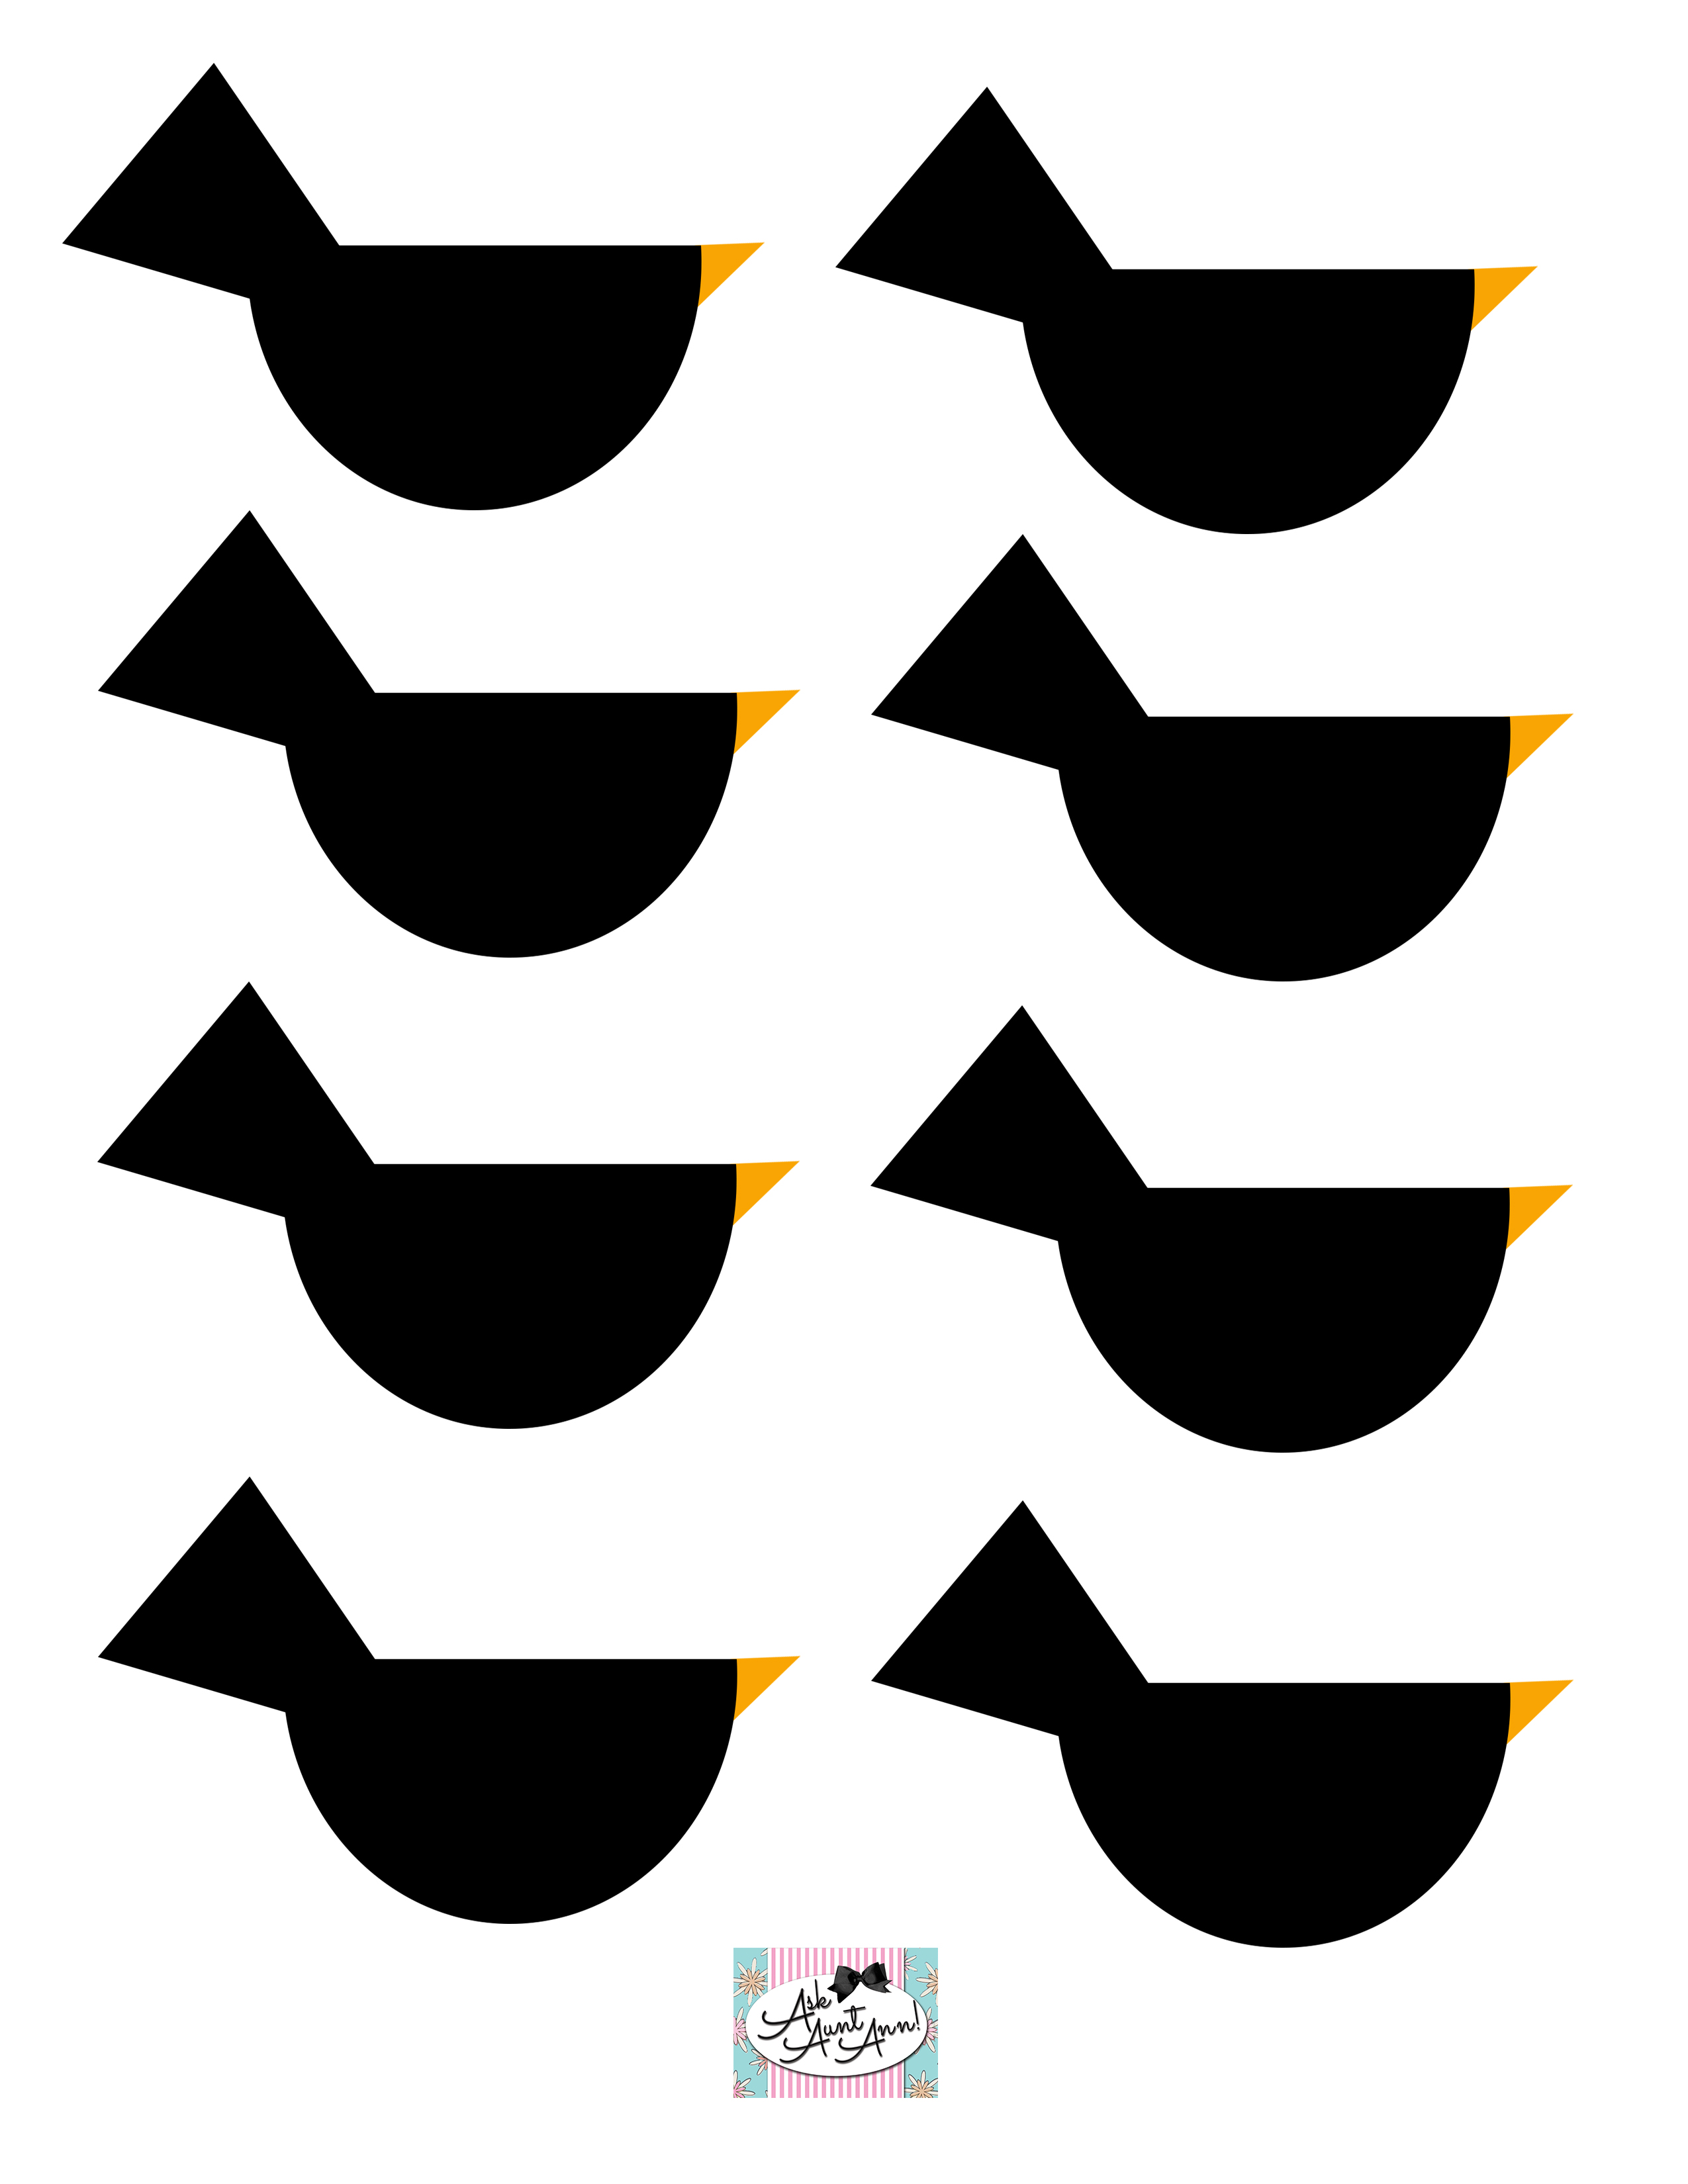
Wheat Bundles
Here’s what you will need:
- yellow & brown construction paper; To add interest you can add a patterned paper to the large bundles.
- twine
- an empty cardboard tube
- double stick & regular tape
- a Popsicle stick
- cute crows
For each place card, cut a piece of each color construction paper in half lengthwise. Take one piece of each color and cut slits on each long end like this – make sure you don’t go past the center. (I like to draw a couple of pencil lines so I have a guide. )
Next, take that card board tube and cut off a one inch piece. Cut that piece open and reroll it to a smaller roll – this will be the core of your bundle – and tape it all the way around to secure.
Now lay the brown paper on top of the yellow and place your small tube at one end of the construction paper in the center – where you didn’t cut! And start rolling.
Once you’re finished, use the double stick tape to secure the end. Cut two pieces of twine about 10 inches long and wind them around the bundle, and secure with a knot.
Carefully fluff out the top and bottom – I like to gently curl the paper.
Next, cut out your crows , and with chalk or a white marker write each guests name on a crow. Attach the crow to your popsicle stick and push it into the bundle. If you don’t want to use the popsicle stick you can always attach it directly to the bundle – make it your own!
For the center pieces, use the same format but make three different heights and use more paper. Always try to decorate using an odd number of items. It makes things more interesting! Add some candy pumpkins, leaves, etc. to create your centerpiece.
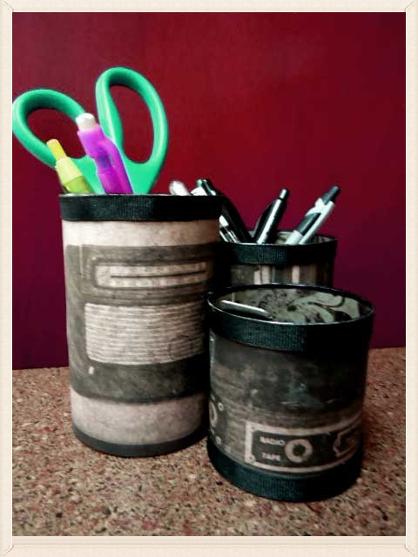
Re-purposed tin can desk caddy
You will need:
o Decorative scrapbooking papers (12”x12” size sheets)
o 1-3 empty and cleaned tin cans (preferably without outer ridges).
o Decorative Duck tape or grosgrain ribbon
o 1 sheet of craft foam in coordinating color
o Craft glue (I recommend Weldbond, which can be purchased from Amazon.com for about $7)
o Pencil
o Scissors
o Straight edge
- Try to carefully remove the labels from the cans and use them as the tracing templates for the decorative paper. Be sure to add an extra ½” onto the length as an overlap for gluing. You will need to trace one label for the outside and one for the inside of the can. Apply decorative paper to inside and outside of can.
- Use decorative Duck Tape (“Duckorate”) to cover the top and bottom rims of the can. Or glue grosgrain ribbon or other pretty trim to cover the top and bottom edges of the paper.
- Trace the bottom of the can onto the craft foam to cut a circle for placing inside the bottom of the can.
- If using more than one can, glue them together and secure them with a rubber band while they dry.